When building a tiny house most people are already aware of the road worthy height limit of 13’6″ to the top of the structure so how can you create space with such a finite amount of vertical height? We are going to show you a few things we did to save precious inches and gain much needed head space inside your tiny house.
Most people start their tiny house build by building a subfloor on top of the trailer as some some trailers are designed in a way of making that the only option. When we designed our trailer for our build (More info on our Custom Trailers) We order the Cross Members to be flush with the deck of the trailer so can be used as the subfloor versus building a subfloor on top of it. This would save time, weight and money for our overall project and the best part is we would gain a extra 3.5″ of vertical space.
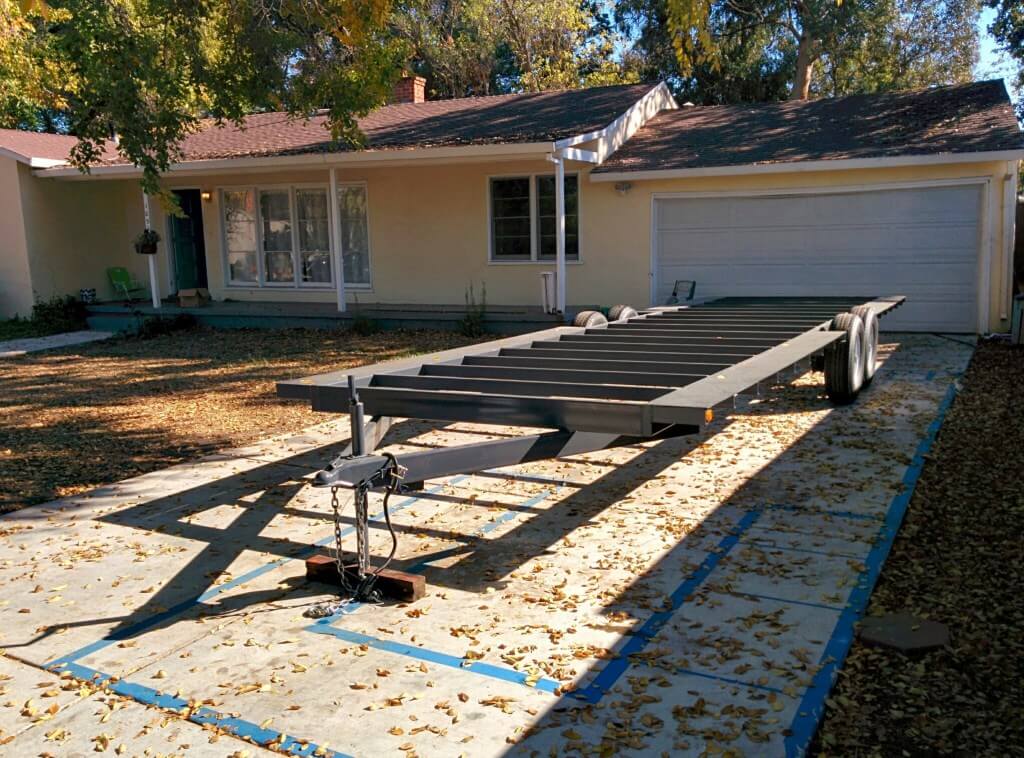
The first step we did was to find the location of our Anchor Bolts (3/8 Threaded Rod Cut To Size) To know where the anchor bolts are to be located, you will need to know where the King Studs will be (the stud that goes all the way from the subfloor to the roof rafters), To know where the king studs are you will need to know all you window and door locations also. With the unlimited variables in Tiny House design its best to either weld or bolt on the anchors yourself versus trying to have the trailer manufacturer to it because like us and many other people building their tiny house, the design can change on a day to day basis.
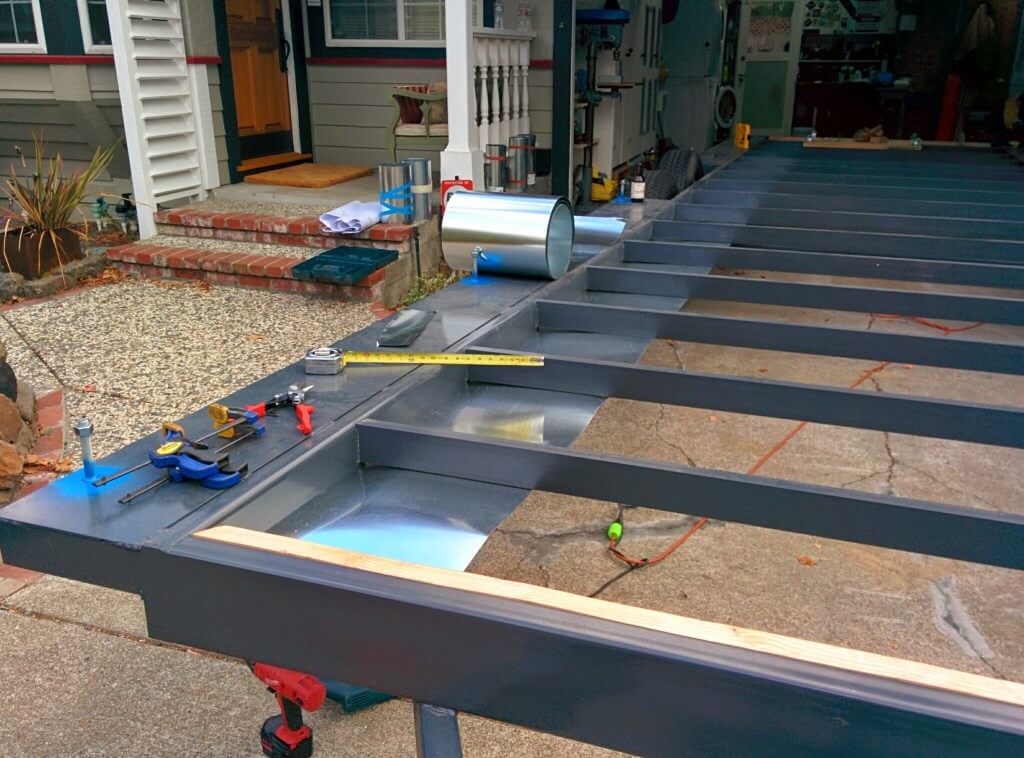
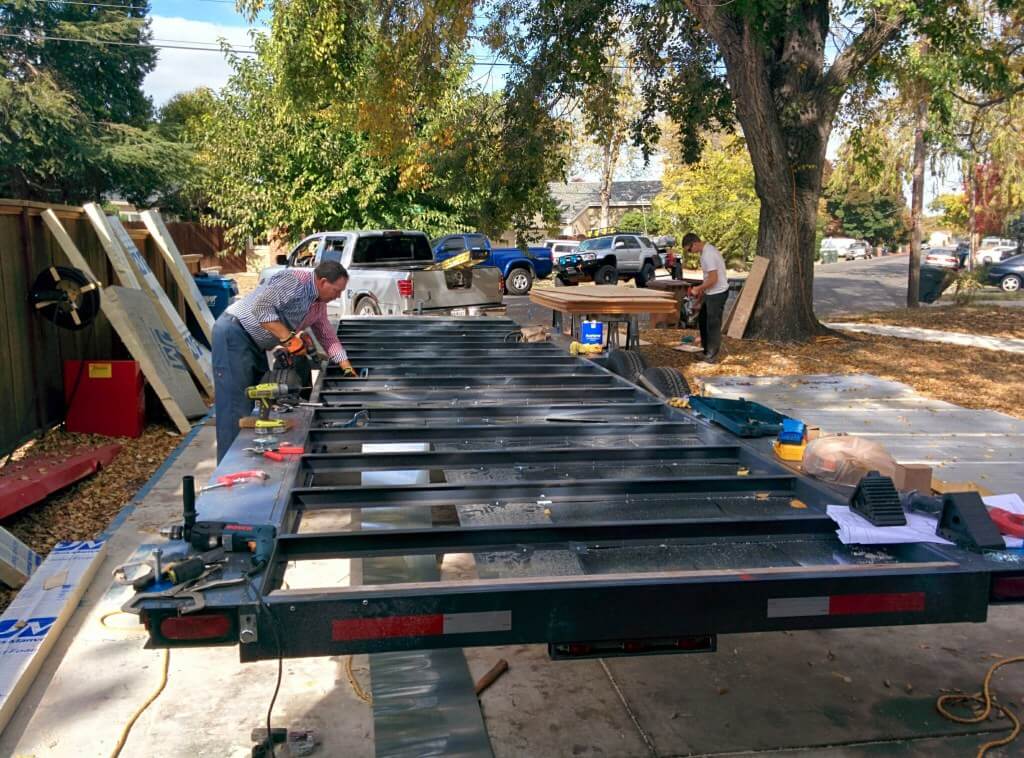
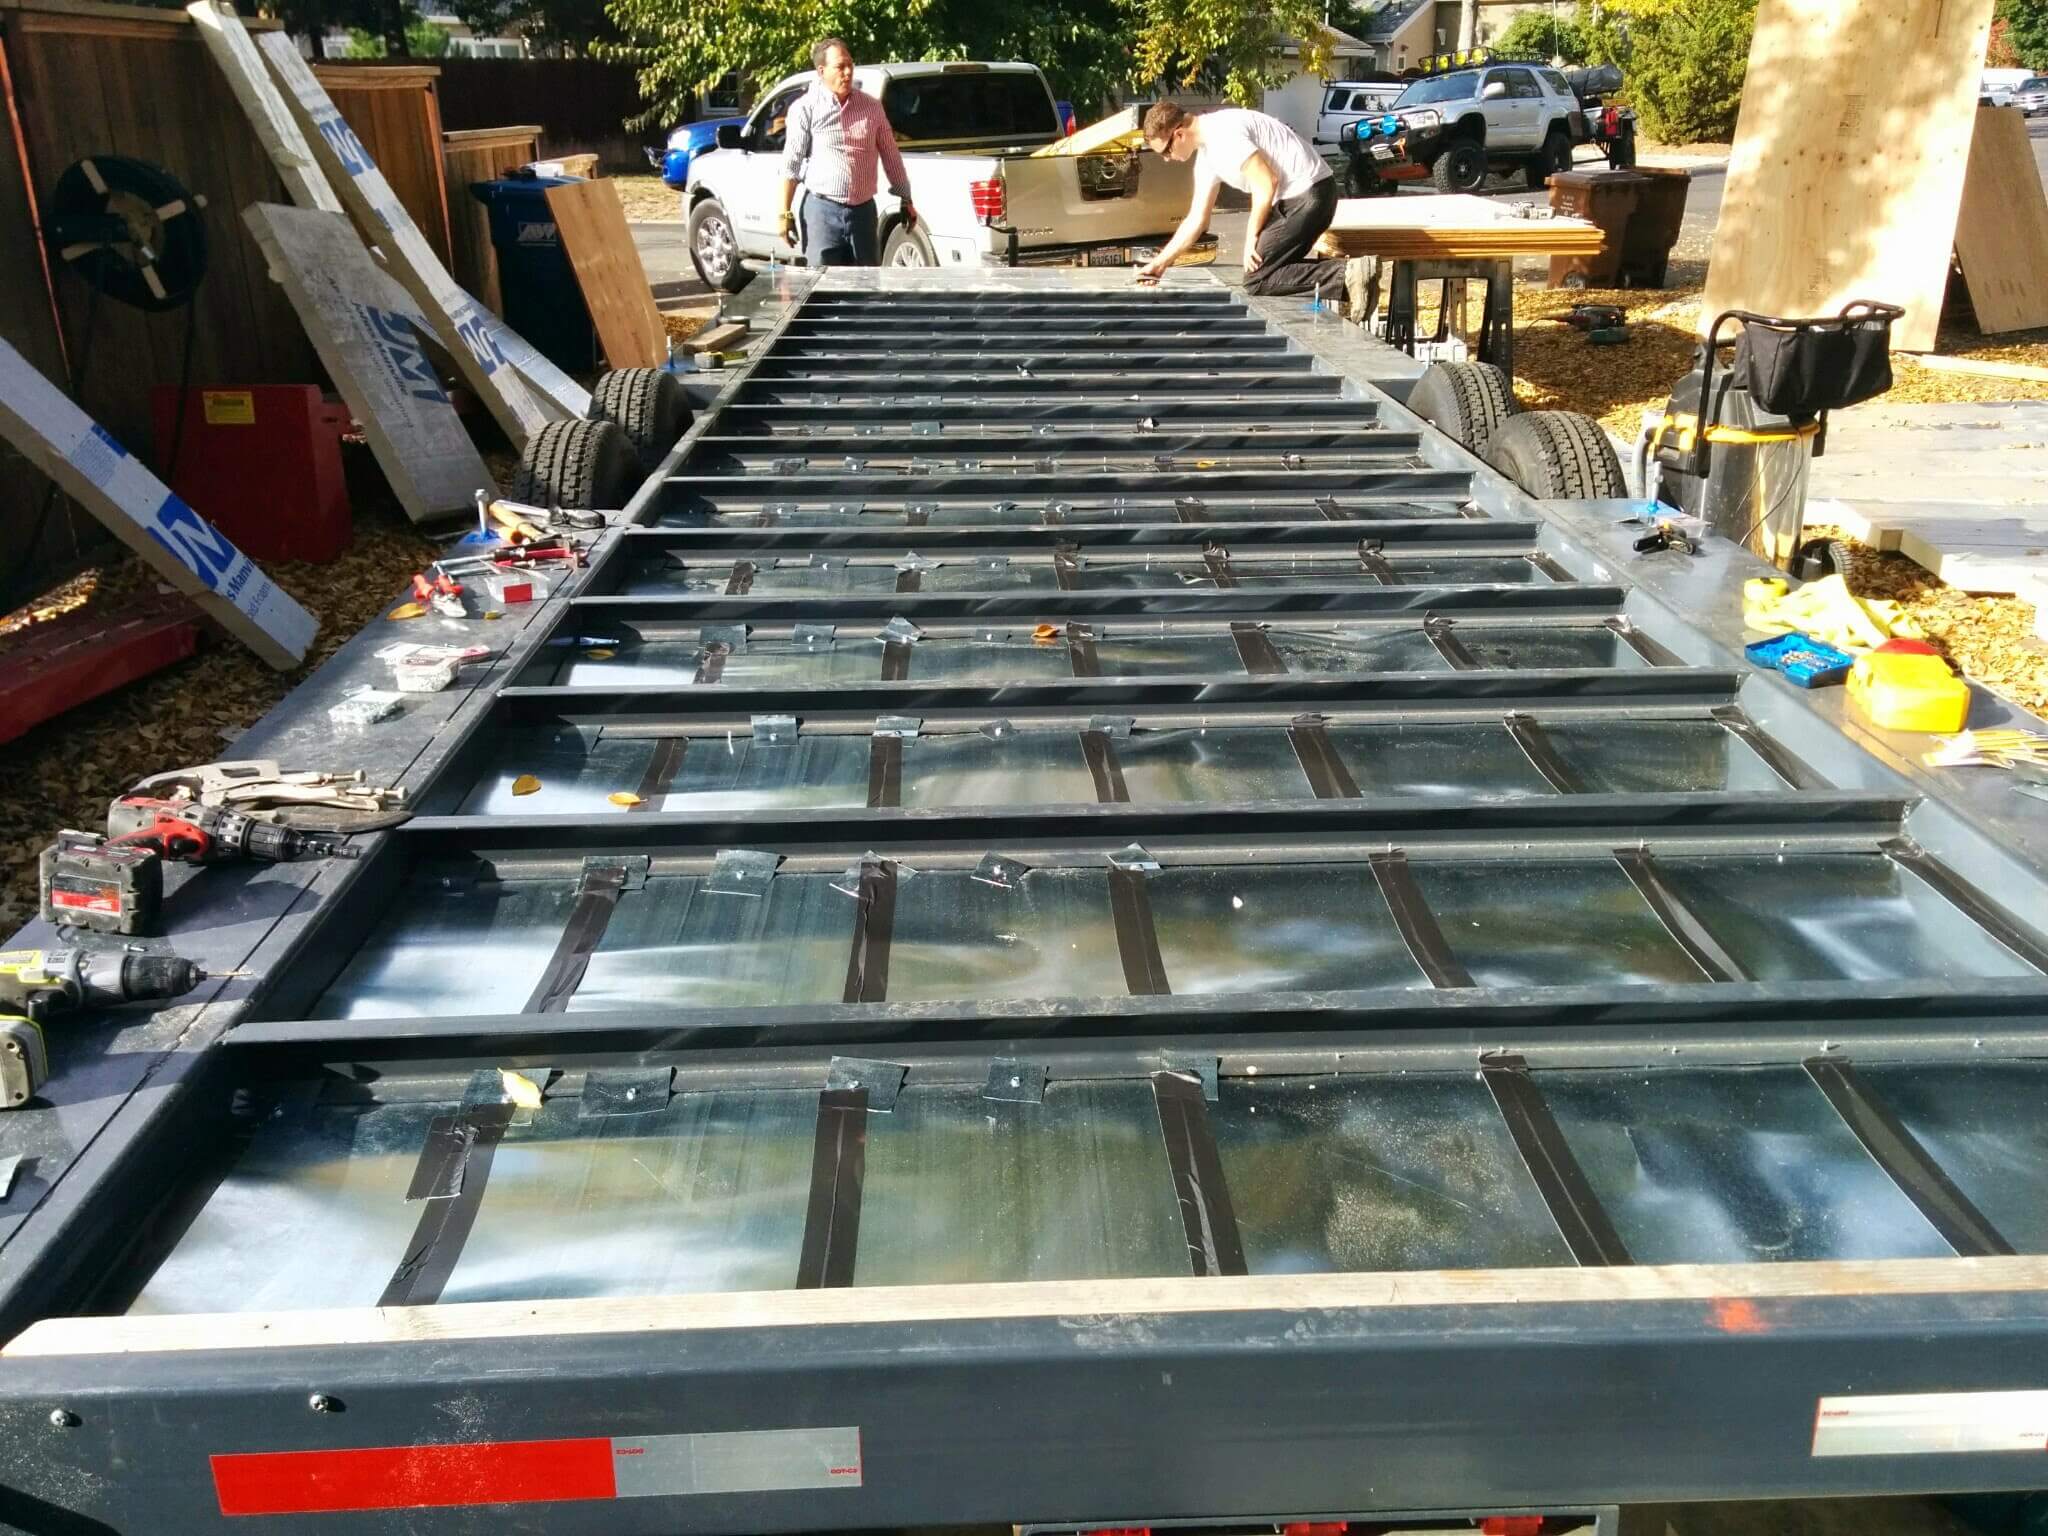
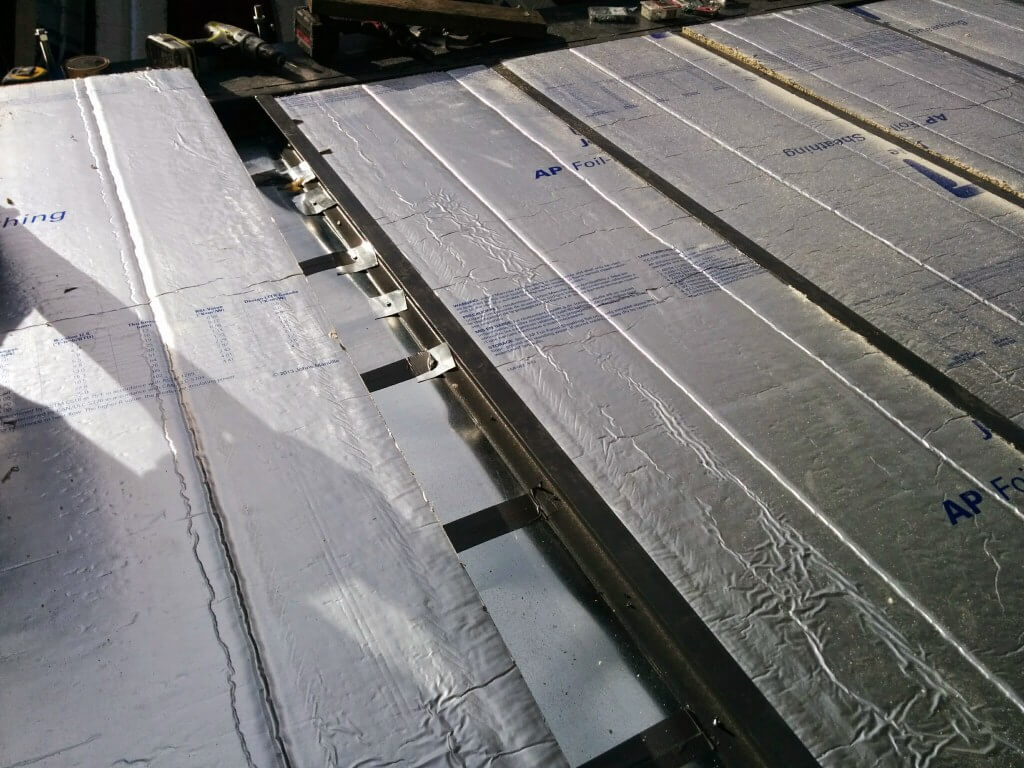
After we welded all the anchor bolts in the correct locations for our design we started with the Flashing. we First bolted a piece of 2×4 on the inside of each end to have a easy starting point for the flashing to secure to. For flashing we decided to go with galvanized steel flashing versus the more expensive aluminum flashing. The galvanized steel flashing was half the price of the aluminum counterpart. The sheets we used were 14″ x 50′ on a roll.
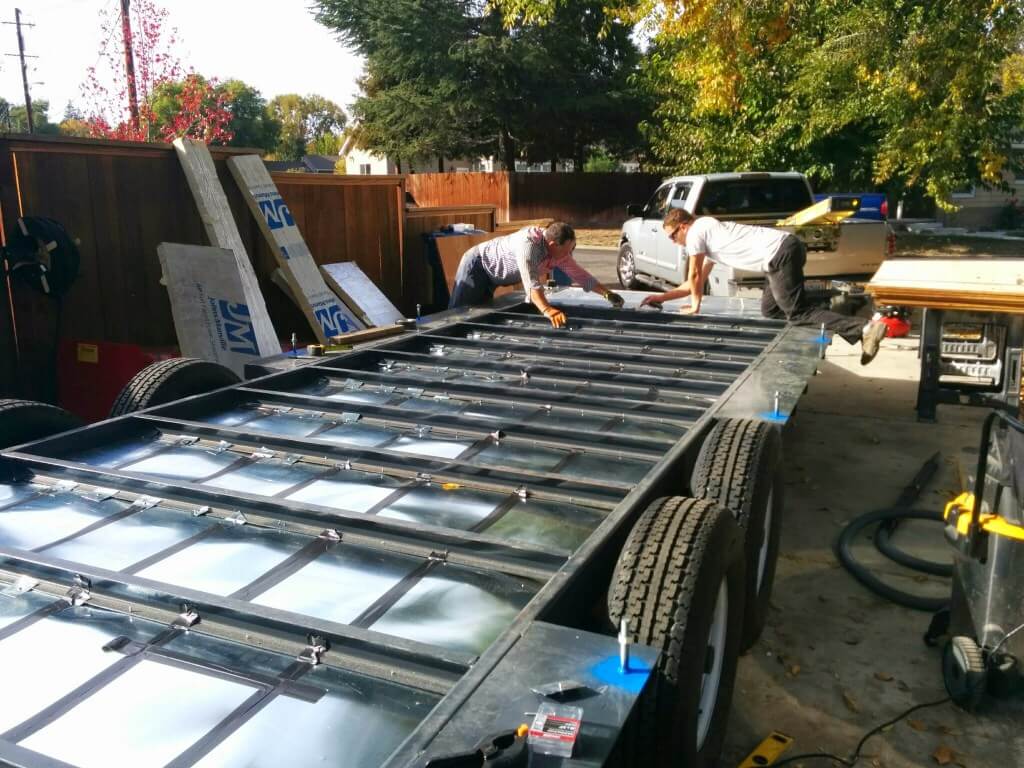
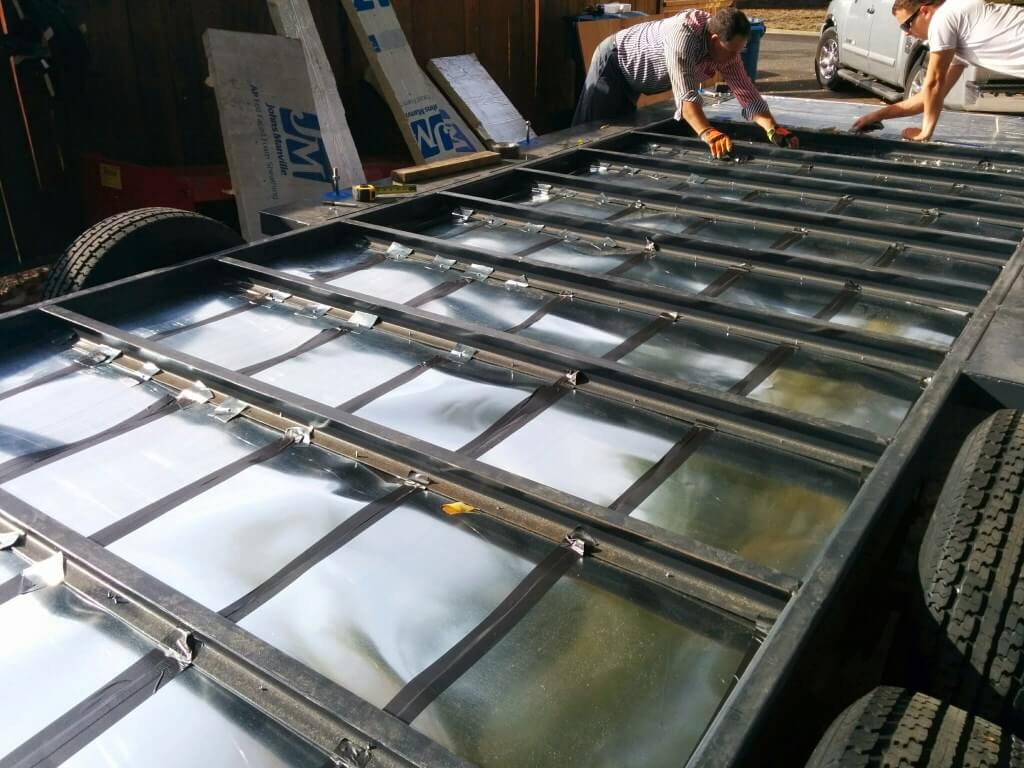
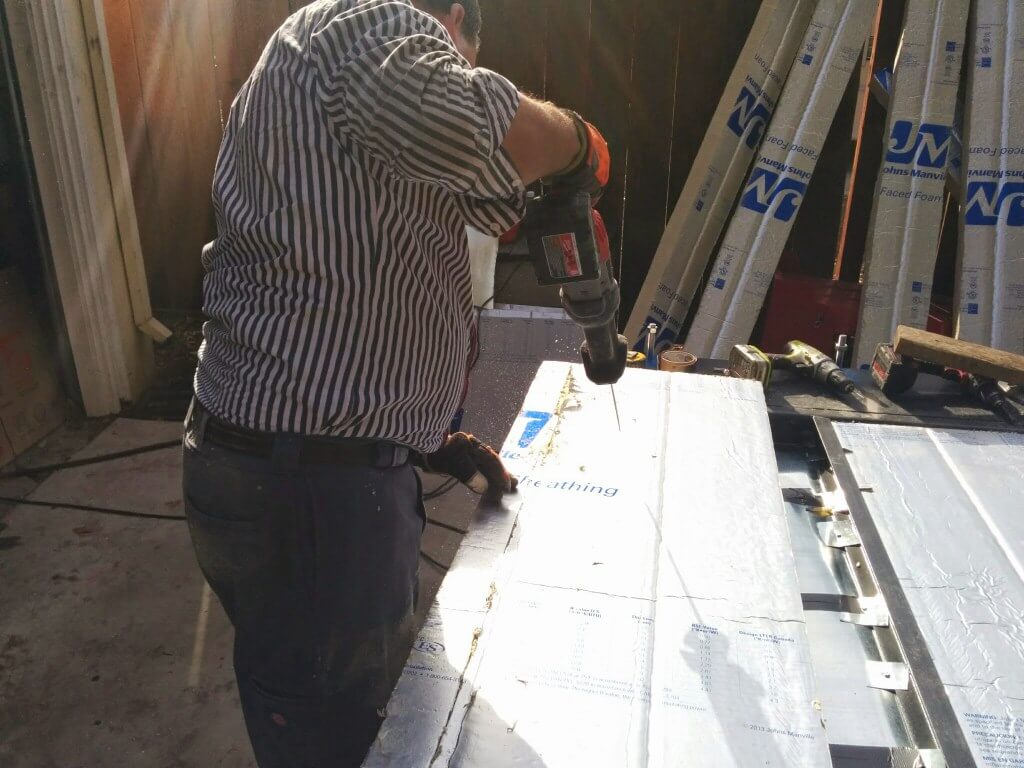
At each cross member we drill a small pilot hole and the secured the flashing with some self tapping metal screws to secure. This was by far one of the most exhausting parts when you are laying on your back and drilling upwards through 1/4″ steel for the pilot holes. We recommend using a corded drill and high quality drill bits plus having a Automotive Creeper to roll around on.
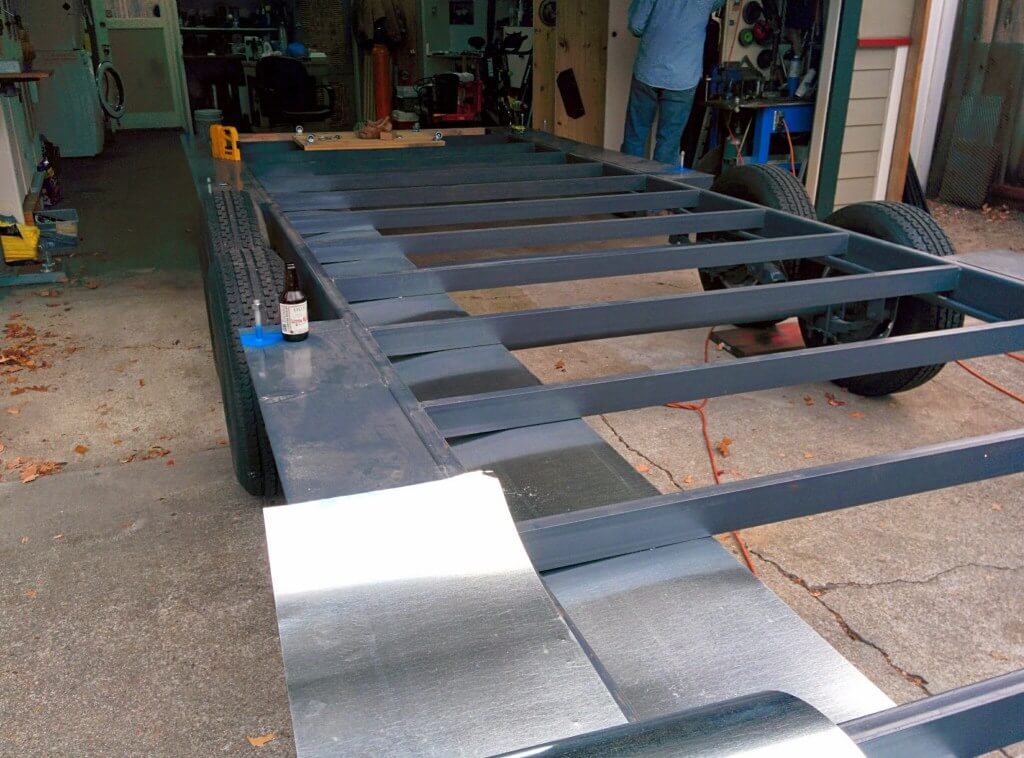
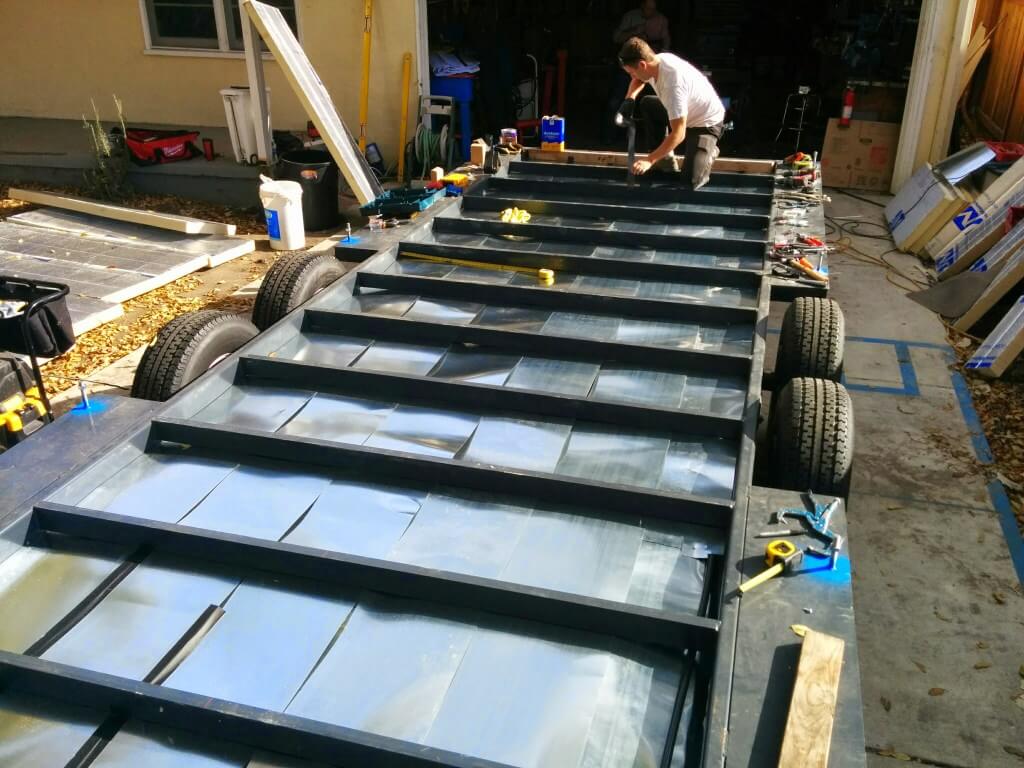
After each row we would overlap the next row over the last. The whole process of doing the full subfloor was 2 full days with 4 good friends.
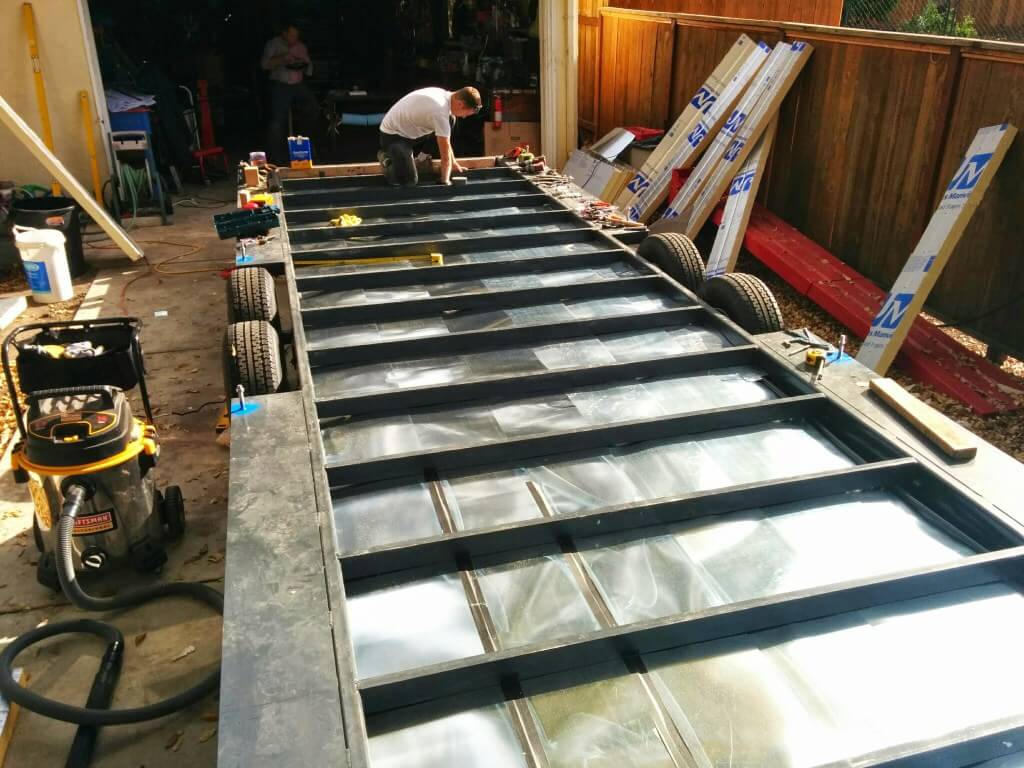
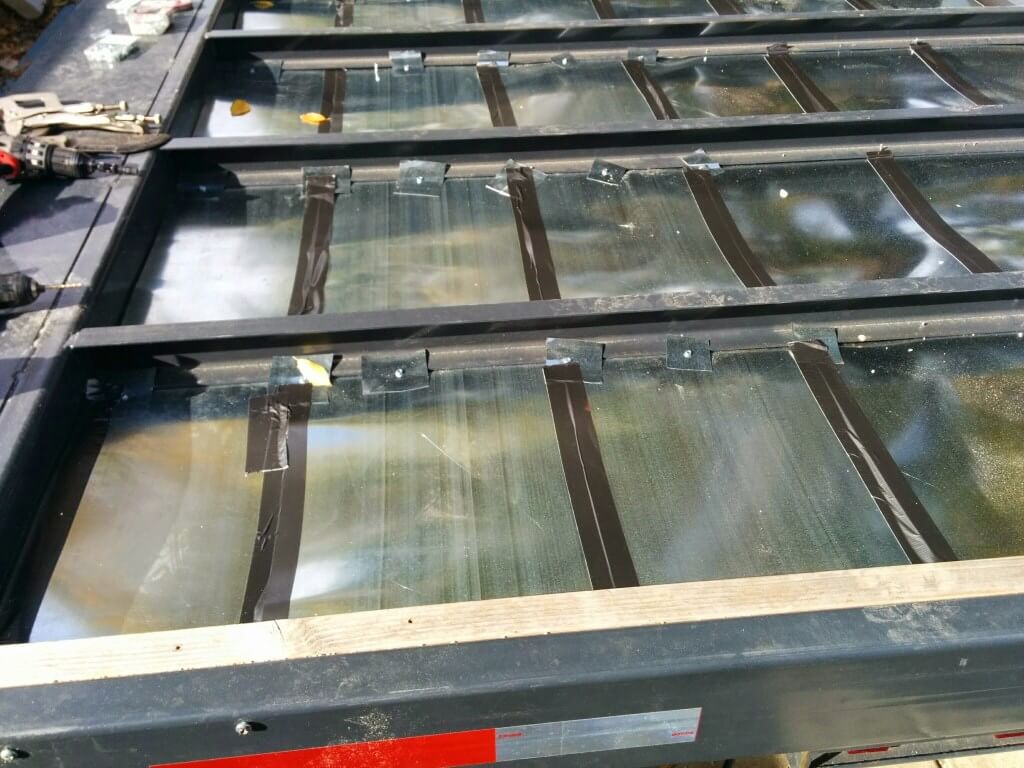
After we finished all the flashing we used very high quality duct tape and taped the inside of each row to seal off any gaps.
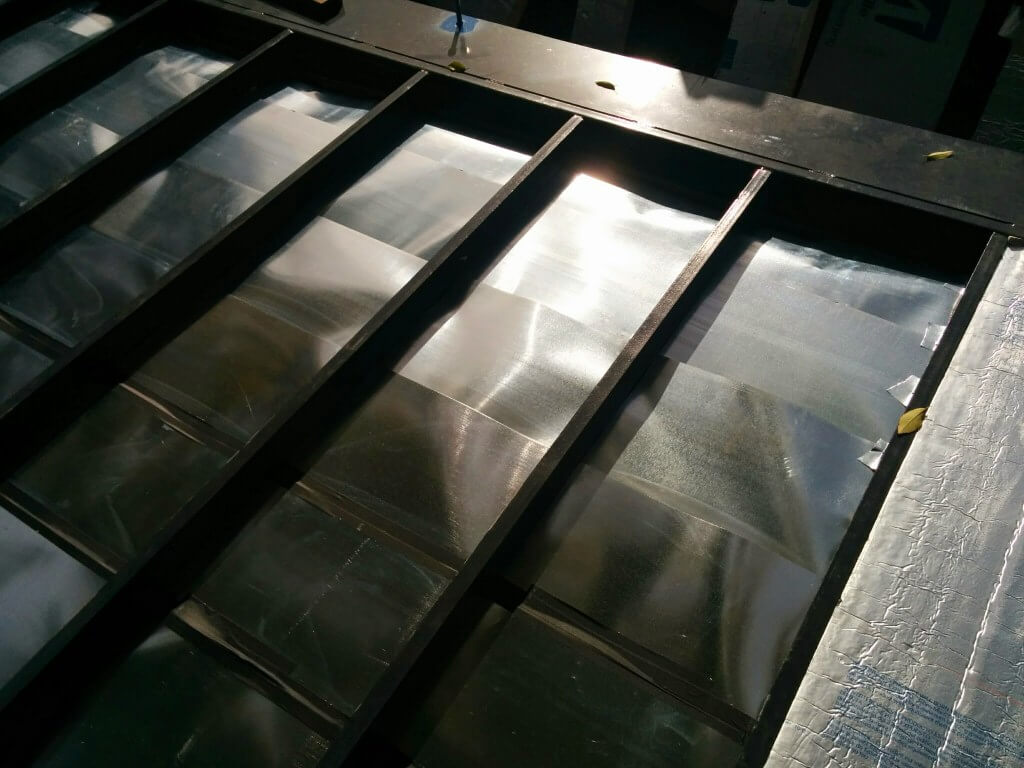
Overlapping Rows
Each row taped up and extra fasteners that we made to help keep the flashing affixed to the trailer.
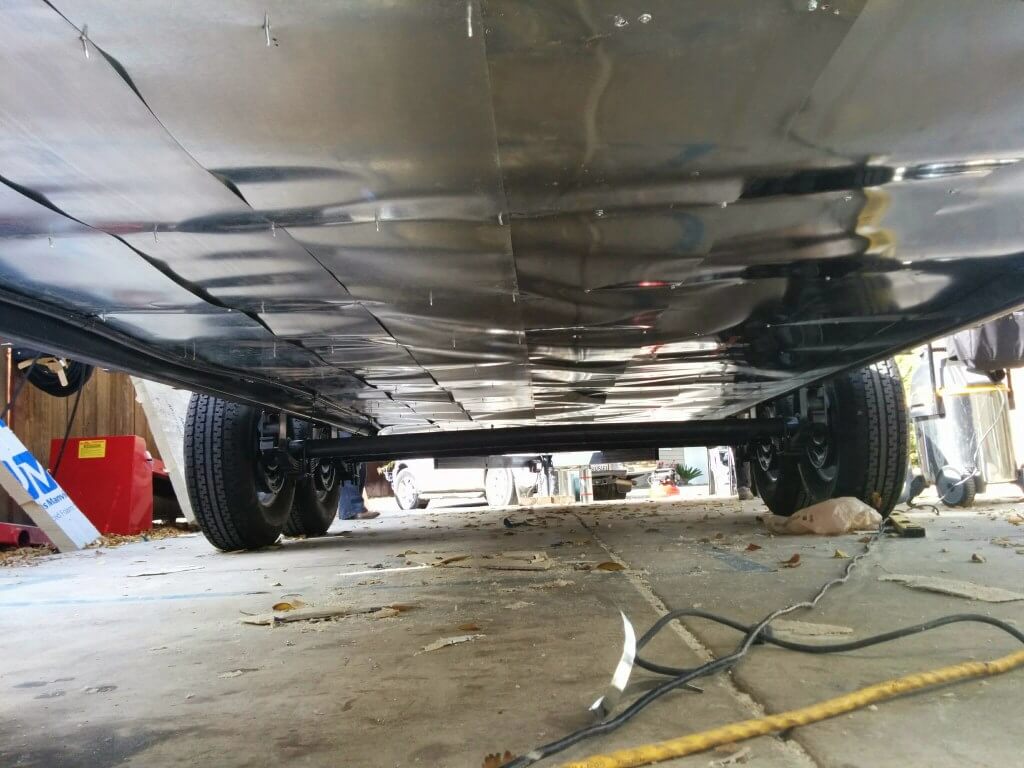
Underneath the finished trailer.
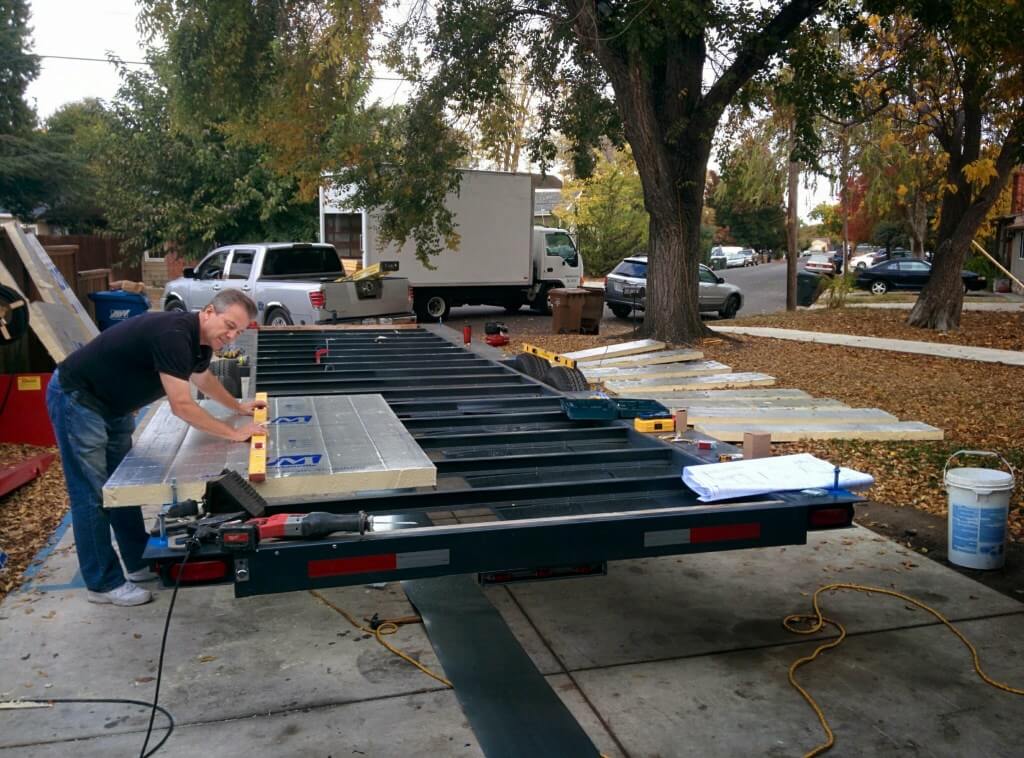
When the flashing was finished we started on the rigid insulation to install between the trailer crossmembers. We used 3″ rigid
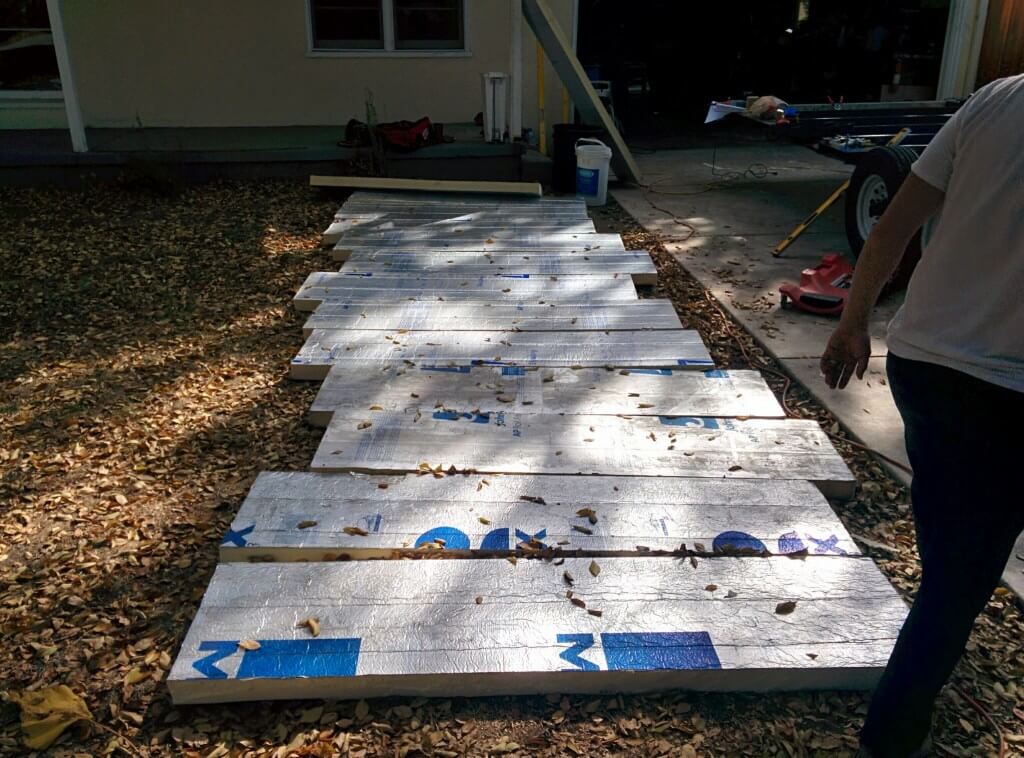
All the pieces laid out in their respective positions.
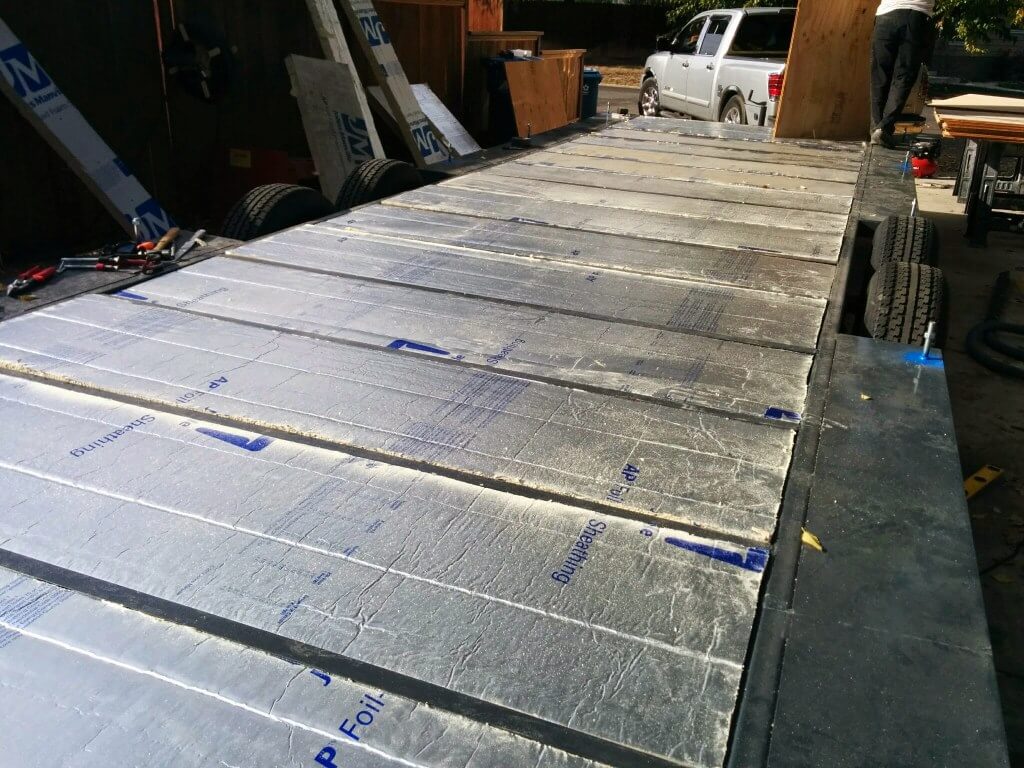
All the insulation installed.
Cutting to fit.
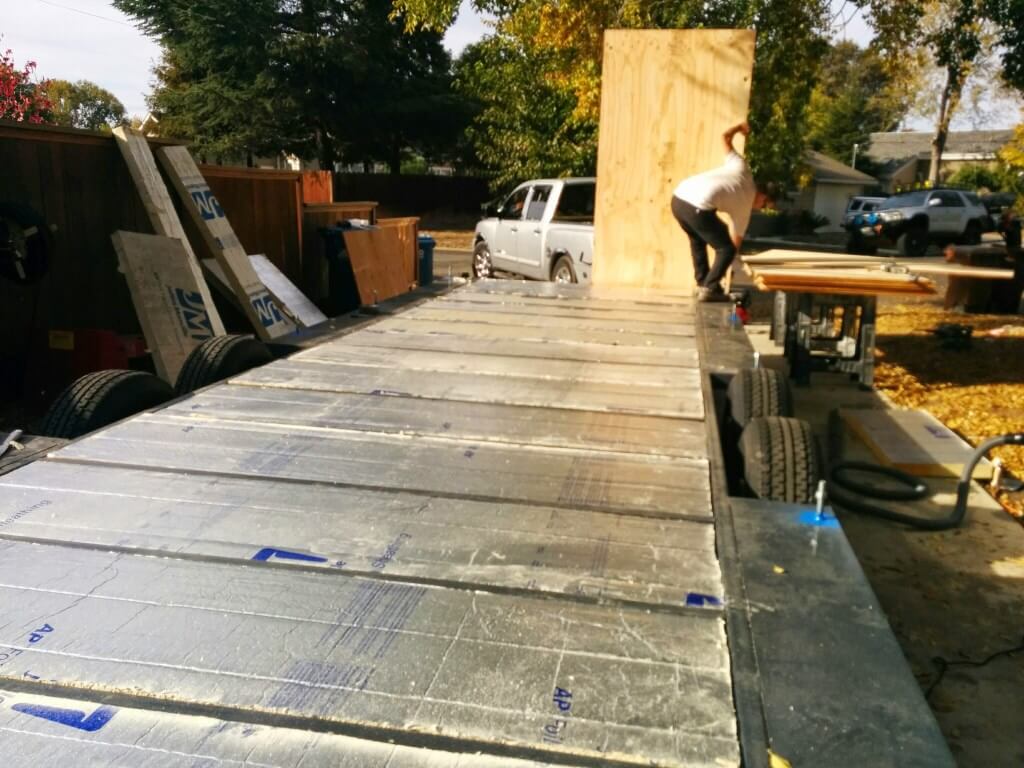
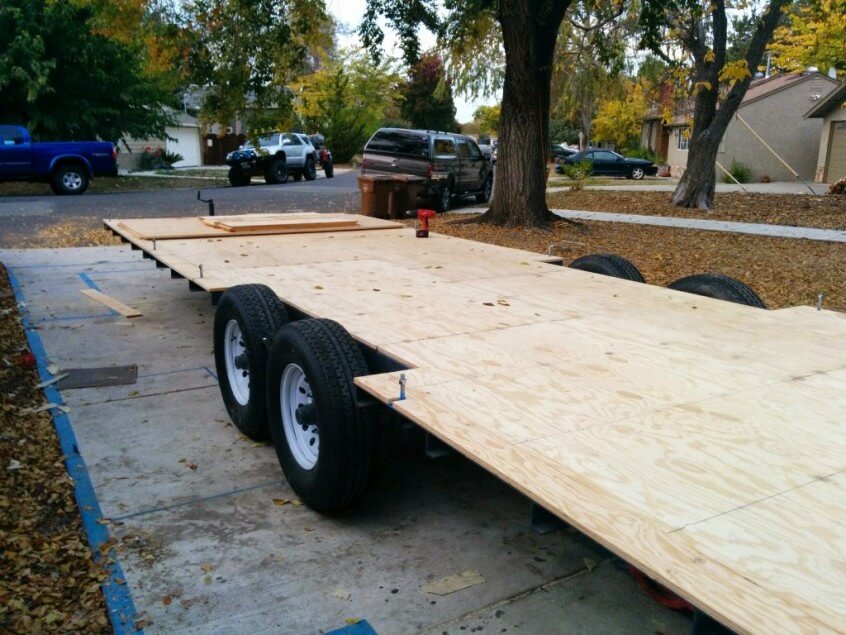
Next Step: Fitting the 3/4″ T&G Plywood Subfloor
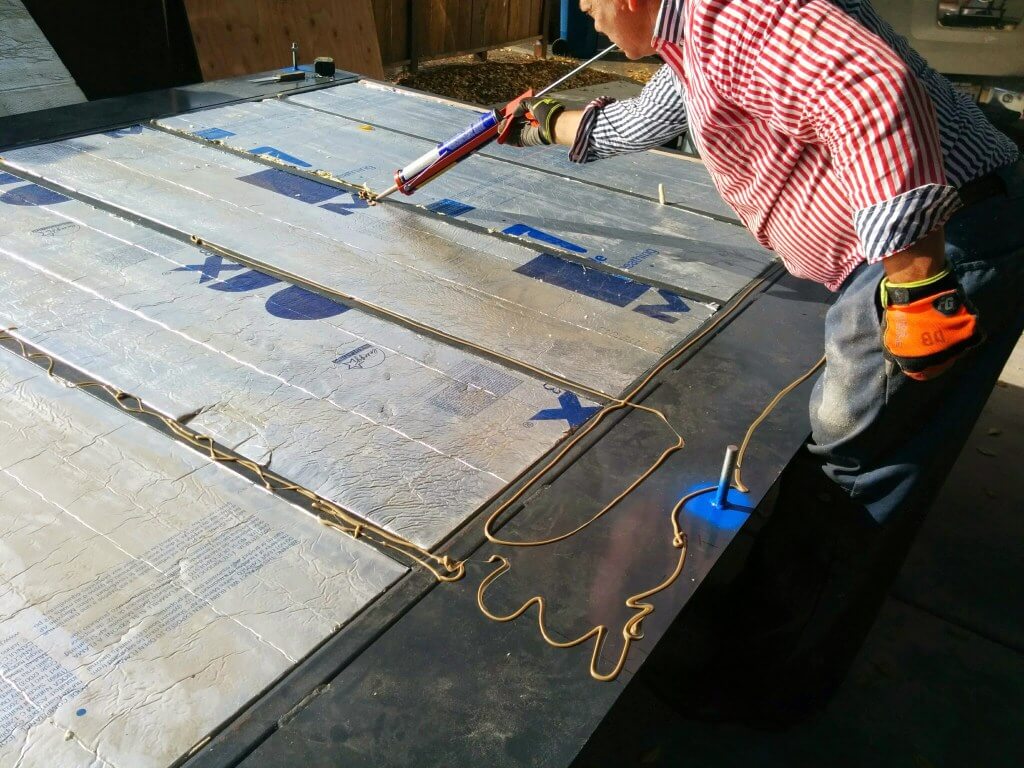
After we test fit all the subfloor it was time to secure them and prevent moisture from getting inside. We used construction adhesive to secure each piece of subfloor to the trailer.
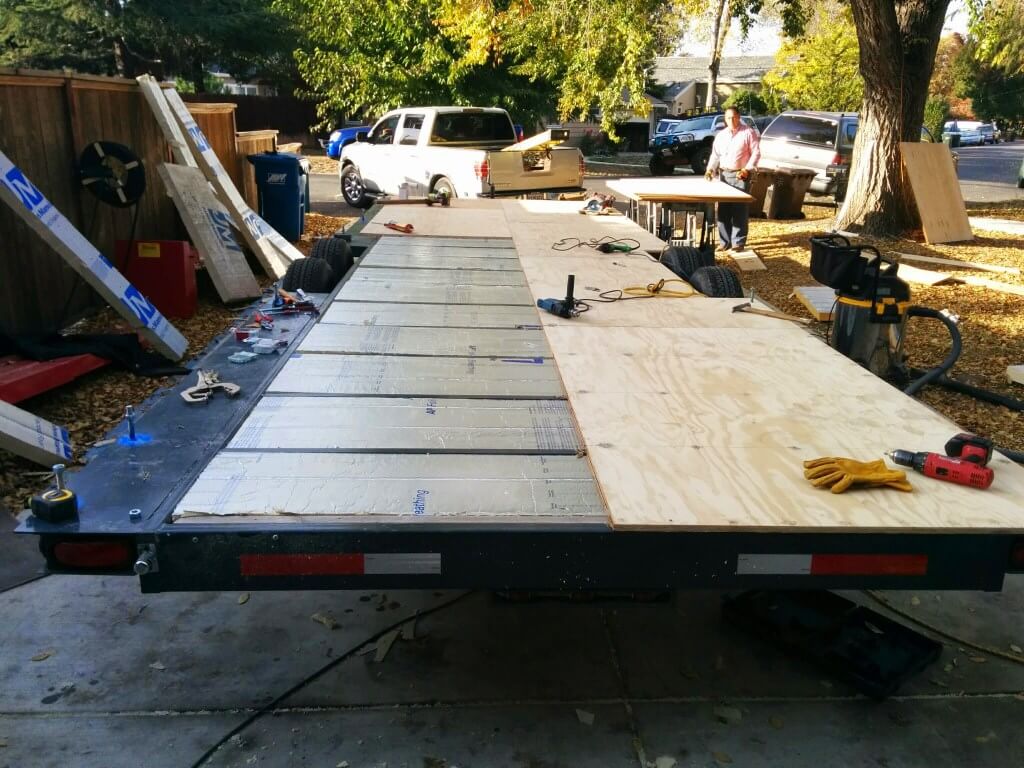
All finished! Using the method we were able to save 3.5″ of vertical space by using the trailer as the subfloor and insulating between the crossmembers. Another method to save a extra 4″ on top of this method is by ordering your trailer with 4″ HD Drop Axles
54 Comments on “How We Used Our Trailer As The Subfloor For Our Tiny House And Gained Vertical Space!”
This is sort of like the squeeze ketchup bottle—why did it take so long for someone to think of this?!?!?! Brilliant!!!
Although the solution might be best appropriate for southern climates. The metal cross members in between the insulation will transmit a good amount of cold . . .
over this past winter we had temps in the low 30’s and we didnt have any problem keeping the inside warm and couldnt feel any cold air coming through but we are in california so it is much different that other parts of the country when it comes to cold weather
The things you can get away with when you live in California. 🙂
I like the idea, but would it not be cheaper and if not, easier, to use sheet steel or sheet aluminum? Seems like there would be less labor if not less cost.
Actually sheet steel would be $100 a sheet times 7 so $700 just for the metal, aluminum sheet would be double
I’m doing mine like this also. How thick is the flashing your using?
I started trying to flash the bottom yesterday, and I tore up the flashing trying to self tap it to the trailer frame.
I’m using aluminum rolls from home depo.
Also thinking of flipping the trailer upside down to make it eaiser. Anyone tried that?
Any advice is welcomed, thanks for reading!
Hi Travis, I understand that it is better to put the same metals next to each other, such as the galvanized steel trailer with galvanized steel flashing, not aluminum. When the metals mix, they can corrode each other so use the steel to steel or put rubberized tape between them.
Correct, it is called Galvanic Corrossion https://en.wikipedia.org/wiki/Galvanic_corrosion & http://www.galvanizeit.org/design-and-fabrication/design-considerations/dissimilar-metals-in-contact
What is the length of your trailer?
It is 28ft Long by 8ft 6in Wide
How wide are your axles from hub face to hub face
92″
Just curious what the weight holds for your trailer with axles / GVWR? I will be building a TH on a 30′ trailer and am debating whether to do two or three axles that hold 16 or 18k lbs.
Also, after you added the siding to your TH, did the width of 8’6″ get extended at all and would this effect the DOT standards for vehicle road safety? I am trying to determine whether I should build the width of the trailer to the standard 102″ or 100″ to allow room for additional space once the shell is up.
Thanks!
Our tiny house weighs in at approx 13,500lbs. we have two axles on our tiny house but if we did it over again we would have done 3 axles, it was a crazy amount of work to weight every material that went into the build and when we moved it we emptied most of the interior contents. we highly recommend building on 3 axles, it is better to buy more trailer than you think you need rather than less. We are a few inches over the 102″ width, we never planned on moving often so we wanted to maximixe the space inside. if you want the exterior to be at 102″ wide we suggest getting your trailer at 99″ wide so with the siding it will be 102″
28ft long
Pingback: Dropped Axles On a Tiny House Trailer | Tiny House Basics
Did you have to pre-drill through the wood and trailer before screwing them down? What screws did you use?
I didnt have to but I did because it was easier that way. I used a tapered head metal screw
Great, thanks.
I am starting my design process and would appreciate knowing what the height of your sub floor is from the ground (using a drop axle). That number will give me an idea of how much interior room I have left before hitting that 13′-6″ number. Thanks for your time on this. BTW… how thick is your roof? I’m looking for numbers so I know my head heights inside.
Our subfloor is approx 22″ off grade on a drop axle trailer. We have 2×8″ rafters for our roof
I’m two months off building my subfloor and this is super helpful, thanks so much! Have you found that the rigid insulation was sturdy enough to ensure the floor doesn’t flex/creak? I’ve seen some people add more studs but would love to avoid the extra weight. Thanks
The rigid insulation has worked out great and is solid as a rock, no creaking of any sort.
Where do you run your plumbing?
We ran the plumbing underneath the trailer for easy access for repairs
Hey guys I plan to use this design as well for my sub floor when my trailer comes next week I’m in the east coast. I just had a question about moisture and air. Have you guys made any adjustments for air on the subfloor in case there is any moisture that finds its way in between the sheet metal with insulation and the cross members? Please advise. This is my only concern otherwise I love the idea. Thanks!
over the past year and a half we havent had any issues with moisture or air coming through the subfloor or the insulation.
Travis,
I’m about to start framing my walls on my tiny house build and we did aluminum flashing under the trailer by tilting it up on one side. We used the tow hitch of a pickup truck, some chain and a come along to get it upright at about a 75 degree angle. There were also 3 muscled guys helping to lift it while I ratcheted the come along. Once upright, we drove some rebar into the ground in front of it and braced it a few spots with 2x4s. It was fine. It stayed upright for 2 days while we flashed the underside. It did slip a bitime when we brought it back down, but only because one of the rebar pegs came loose. We just moved the truck, attached themail come along assembly to the otheright side and ratcheted back into place on its supports. It wasn’t a perfect procedure but no one was hurt and the trailer, truck, etc were undamaged.
Hi Travis, I was thinking of doing the same thing to flash my trailer. Do you have any pics of your procedure? Thanks
I’m considering demoing my 34 foot park model trailer . It has extensive rot on the floor, and roof leaks. But it has a nice frame. I am inspired to try a tiny house. I remodel homes now, so should be more of the same, only compact. Are there really people who will pay 30,000 plus for these things. I’m not convinced. Lots of work and money for a backyard grandchild playhouse. I’m up for the challenge, but just saying. Do you enlarge the window rough in to reduce the risk of a broken window from trailer flex?
Hello Tim,
it all depends on the quality of the finished build, from our experience, we dont see units using old park model trailers or rv trailers as a good start for a foundation if you are looking to resell the unit. it is best to buy a brand new trailer as your foundation if you are looking to build and make a profit. http://www.TinyHouseBasics.com/TinyHouseTrailers
there is a lot of great methods to use for flashing, wether it is steel flashing or vinyl or even a ice rain shield. the steel flashing and heavy duty gorilla tape has really held up well for us and many others. some people just have the steel flashing alone.
Couple of questions. How much was the overlap? Did you use self tapping screws on the overlapping arts or just connecting to the frame? would rivet work ok on the overlaps? Did you then coat the underside with any kind of undercoating (brush on or spray)? I am just thinking that it might offer more protection from road debris along with protecting from moisture coming in. Thanks for the great article! I am in the process of starting a tiny home on a old popup camper frame.
we overlapped about 4 inches on each pass. self tapping screws dont work to well on 1/4″ steel so we predrilled holes. no coating on the underside, just heavy duty gorilla tape on the seams on both sides, the only area that will get direct road debris in in the fender area. im sure any bit of extra protection could help though!
I know you said in a previous comment that you haven’t had any problems with moisture, that being said, did you use a vapor barrier between the metal and the rigid foam?
Also, I’m considering spot-welding, rather than screwing the flashing onto the frame. pros/cons?
Thanks!
we didnt use a vapor barrier between the rigid foam and the trailer, we needed to make a secure connection between the plywood subfloor and the trailer so we glued and screwed the subfloor to the metal, adding a vapor barrier in between would have made it extremely difficult to secure to each other.
Yes spot welding would be a suitable method to secure the flashing, just make sure you have the settings right to match the thickness of the sheetmetal you plan on using in order to make proper fusion to the trailer without burning through the flashing. keep in mind most trailers (all of ours) are 1/4″ thick steel so it takes some heat to make proper fusion.
Awesome! I did the same for a much smaller camper, but needed to maximize usable height since I have some larger off roading tires on it that raised the trailer quite a bit.
One question, did you have any trouble getting it registered? You may have not needed a trailer inspection considering it was an ordered trailer, but I’m about to have my homebuilt trailer inspected and I’ve more or less “hidden” it by using this technique for the trailer frame subfloor. Just curious if you had anything to comment on here.
Thanks!
Nate
What was the spacing between the “joists” here? 24″ OC?
the spacing is 16″
Would have used a very high quality silicon between the over laps. Moisture is not our friend. Metal studs will minimize the weight issue also..A petite woman could carry 25 metal studs and maybe 4 typical wood studs. I enjoyed this forum. Nice job on your frame etc. I was thinking about using a 30′ 5th wheel frame but your trailer frame has changed my mind. Good job.
Pingback: trailer has arrived – {love}red.lodge
Is it absolutely necessary to weld the anchor bolts for your finished design before beginning flashing? Is it possible to flash while still working out some final details on the design and add the anchor bolts as the second step?
Curious about a couple of things as I contemplate designing one:
1. how about applying vapor barrier above the flashing on the underside?
2. Or better yet, spray insulation in the cavities topped by full deck of foil sheathing? (flashing is essentially the bottom sheathing; sprayed insulation could also act as vapor barrier since it will expand to find and fill any openings; slightly lighter weight overall; tighter seal on both sides so less chance for moisture issues)
3. If subfloor panel is well glued at the edges to keep out moisture, why not fasten to the joists? should be minimal temperature transfer for screw heads, but much more rigid overall than glue
4. Definitely agree: much easier, fluid, efficient construction of all the above, by turning frame on its side (sans tires, or even before axle is on).
5. How are the sides and ends of the flashing sealed where they meet the frame or 2×4″? Tape? (The photo shows some pretty serious gaps, even when overlapped are kind of questionable as to properly sealed)
I’m wondering how this would perform in extreme weather, like the winter in chicago, because the subfloor is directly sitting on metal frame (also connect to the metal flashing), which is literally a huge heat dissipater, may render all of those insulations useless.
Would it be possible to attach the anchor bolts after flashing the trailer but before adding insulation?
When wondering about heat/cold transfer on the floors…remember, this is the SUBFLOOR. I/you will be putting flooring down on top of the subfloor. If using ‘floating’ floors, and sometimes with wood floors, there is a foam under-layment as well.
Aloha,
I am another person wondering if it is absolutely necessary to weld the anchor bolts for your finished design before beginning flashing? Is it possible to flash while still working out some final details on the design and add the anchor bolts as the second step?
My window plaements have not been finalized but the trailer guy is willing to do the flashing and plywood decking prior to delivery. This would be a huge help since the building is being constructed by the High School Wood shop.
Hey! Love this idea!
I really want to do this method! Quick question. Is there a worry about the whole house flexing too much when driving since it doesn’t have lumber subflooring as sort of a “buffer zone” for movement?
Thanks so much!
Great questions, the Steel of the trailer will provide much more structural rigidity over wood framing inside it as a subfloor
Keep up the great work guyz.
Hello! Our trailer has the flashing pre-installed and we are planning to put the rigid foam inbetween the beams to create our subfloor. When it comes to the plywood, do we need to only glue it to the frame, or do we also need to screw the plywood into the frame? If yes, which screws do you recommend and how where do you recommend placing the screws?
Thanks!
Hello Mary, We would recommend glueing and screwing and using a wood to metal screw
Pingback: Building Tiny Guide - Foundation - Riding Tiny